Learning Objectives – Gain a full understanding of the library and each of the tabs it contains
The library is where all your maps, workspaces, territories, and datasets are stored. You can access the library using the drop down in the top right of your screen, or by clicking the eSpatial logo on the top left-hand-side of your screen.

Within the library, there are several different tabs for organization. These tabs can be seen in the image below, and will all be explained in the following class.
%20Library%20SS-1.png?width=688&height=240&name=(Module%202)%20Library%20SS-1.png)
Workspace tab
Here you can search for a workspace or a map by typing in the Search box. Any workspaces or maps that match your criteria will be returned. Workspaces and Maps can also be sorted by name, date created, or date modified.
%20Workspaces%20Updated.png?width=688&height=292&name=(Class%201)%20Workspaces%20Updated.png)
You can also Click on the Switch to Map View /Switch to Workspace View link to toggle between map view and workspace view and click on a workspace name in the workspace tree or in the main window to see any maps saved in that workspace. Once a Workspace is selected, it can be deleted by clicking on Delete Workspace and can be shared using the Share icon. Clicking on a map name within the workspace will open that map.
%20In%20Workspace%20Updated.png?width=688&height=129&name=(Class%201)%20In%20Workspace%20Updated.png)
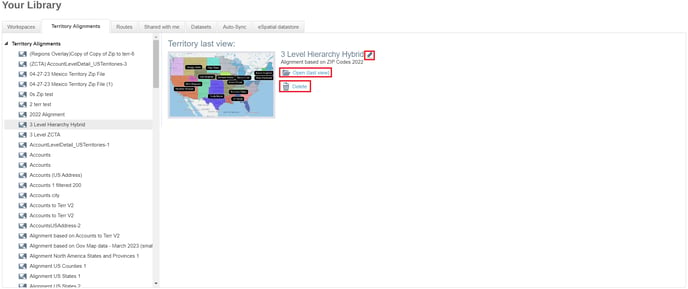
Territory Alignments tab
Here you can search for a territory by typing in the Search box. Any territories that match your criteria will be returned. Territories can also be sorted by name, date created, or date modified.
Clicking on a Territory name in the territory tree will reveal more info about it. A territory can be renamed by clicking on the Pencil icon beside the Territory name.
A territory can be deleted by clicking on the delete icon and can be opened by clicking on the open icon or the map thumbnail.
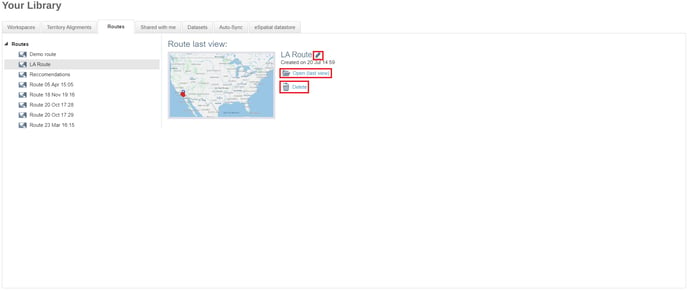
Routes tab
Here you can Search for a route by typing in the Search box. Any routes that match your criteria will be returned. Routes can be sorted by Name, Date Created, Date Modified, Start date, and End date.
Clicking on a route name in the Routes tree will show more info about the route. A route can be renamed by clicking on the Pencil icon beside the Route name.
A route can be deleted by clicking on the Delete icon and can be opened by clicking on the Open icon or the map thumbnail.
Shared with me tab
This is where all the maps, workspaces, territory alignments and routes that have been created by other users and shared with you are stored.
Here you can search for a Shared Map by typing in the search box. Any Shared Maps that match your criteria will be returned. Click on the Show Public Maps checkbox to allow maps that have been shared publicly to be visible in your library. You can open a map by clicking on the Map name.
Once you open a Shared Map you can Save as a new workspace owned by you using the Save button in the Control Panel.
Datasets Tab
This is where all the datasets that you have uploaded, added from the eSpatial datastore, have been shared with you, or have been created by you are stored. Datasets can be sorted by Type, Name, Description, Date Created, Date Modified, Owner and Integration
A dataset can be deleted by checking the box next to it and then clicking on the Delete icon. Multiple Datasets can be deleted at the same time using this method.

Any unused datasets can be seen by checking Show Unused Datasets box. This will then display all datasets that are not currently in use on a map.

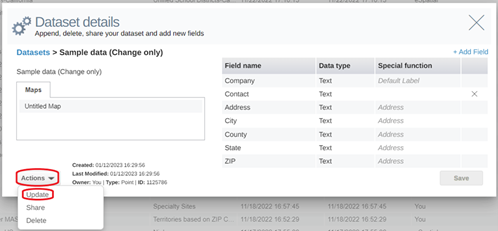
Clicking on a dataset from the list will open the Dataset Details window. Within the window, all maps that this dataset appears on are listed in the Maps box. Clicking on the Actions button and selecting Update will allow you update the dataset using our Merge, Append, or Overwrite options. This option is only available for datasets that you have uploaded. Clicking on the Actions button and selecting Delete will delete the dataset. Click on the Actions button and select Share to share the dataset.

Updating Data
There are three update options available within the dataset details window – Merge, Append, and Overwrite. All three can be accessed using the Update option from the Actions dropdown in the Dataset details window.
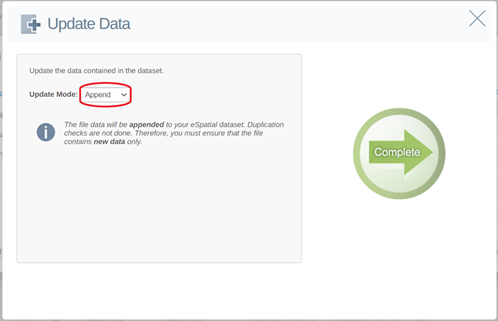
Once you have uploaded data to eSpatial you may wish to add more data to that dataset. The Append option is suitable when you are adding new data that isn’t already on the datasheet. Once you click Update, choose Append from the Update Mode drop down. After this, click Complete to update your dataset.
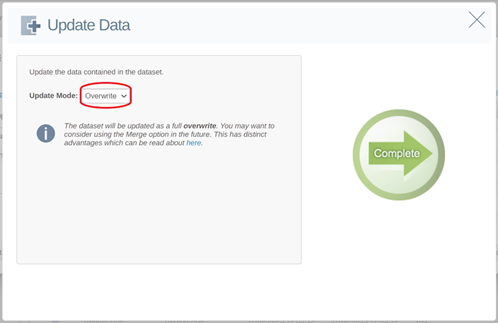
The Overwrite function is best used when your dataset contains records that are already uploaded to eSpatial. Once you click Update, choose Overwrite from the Update Mode drop down. After this click Complete to update your dataset.
The Merge option allows you include a unique identifier in your data enabling you to perform change-only updates. This is most useful in eRouting and eTerritories, where you may have exceptions in place. If updating your data using a unique ID, you will need to ensure that the column exists in both the file used for updating and the dataset which is being updated, and that the data in both the file and the dataset is unique. After clicking Update, choose Merge from the Update Mode drop down.
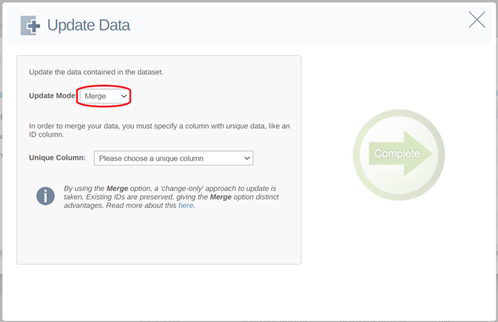
Then, click on the Unique Column dropdown and select the Unique ID column that is present in both your existing dataset and the file being used to update it. Once the Unique ID field has been chosen, click Complete to update your dataset.

It is important to note that if a unique column is not specified, data will be entirely overwritten by the new file.
eSpatial Datastore Tab
Here you will find all datasets provided by eSpatial. In general, these will be boundary datasets. Here you can search for a dataset by typing in the Search box. Any datasets that match your criteria will be returned. Datasets can be sorted by Name, Description and Region.
Clicking the plus icon will add the dataset to the datasets tab in your library, while the book icon shows which datasets have already been added.
%20Library%20datastore%20SS.png?width=688&height=146&name=(Module%202)%20Library%20datastore%20SS.png)