Learning Objectives – Understanding of different methods of saving, exporting and sharing maps.
Saving
The save options can be found in your Control Panel, as previously mentioned in Module 3. Clicking on the Save button will open the dropdown with multiple options to choose. Please see Module 2, Class 3 for explanations on the different save options.
eSpatial will highlight unsaved changes on your map by displaying an orange attention icon on your Save button.
 Before you can share your map, you must ensure it is saved.
Sharing
Maps can be shared publicly or within your team. All map sharing can be done from the control panel. Please note that the same map cannot be shared both publicly and with your team.
Sharing Maps Publicly
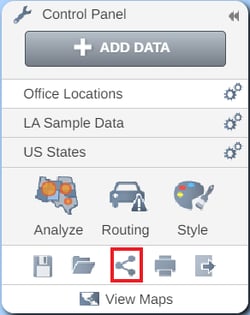
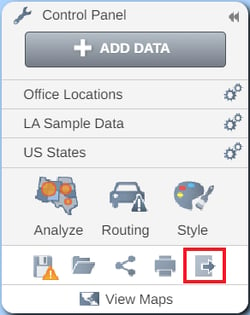
To share a map publicly, firstly click on the Share icon, at the bottom of the control panel, to open the Share Map window.
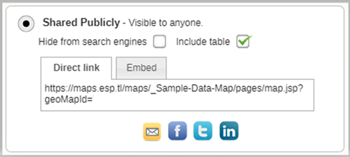
Click on Shared Publicly to set the map to be shared publicly. This will make it visible to anyone with the public link.
.png?width=500&height=480&name=Share%20options%20(pUBLIC).png)
You can also click on the Hide from search engines option to make your map unsearchable, and choose to include a table with your shared map by checking the Include table option. Please note that even if you do choose to Hide from search engines, the map is still publicly available so it can still be accessed by anyone with the link. You can then click the Done button to generate your map links.
Sharing Maps Within your team
The Shared within team option allows you to share your maps securely with other members of your team so that you can collaborate on maps. Any map shared within team will appear in the library of the members of the Groups or Users that it has been shared with.
To share a map within your team, first click on the Share button to open the Share Map window. Then, choose Shared within Team to set the map to be shared with other users on your account.
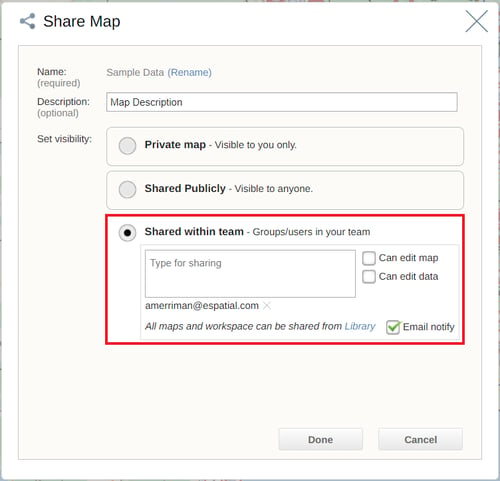
Start typing the name of the Group or the email of the individual user you want to share with.
Give the group or user the following permissions as needed:
- Can edit map– the group or user can edit the map specified.
- Can edit data– the group or user can edit the data on the map specified.
Click on the Email notify check box to send an email to the members of the groups or the users you have shared with. This will notify them that you have shared a map with them, and they can find it in their Library. They will also get a notification at the Bell icon beside their username in the top right of eSpatial.
Click on the Done button to finish sharing and return your map.
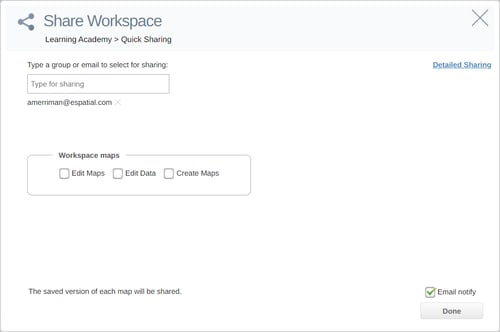
Sharing Workspaces
Sharing workspaces can be done from within the eSpatial Library. Select the Share icon beside the workspace name to share it.
%20Share%20in%20Workspace-1.png?width=670&height=122&name=(Class%204)%20Share%20in%20Workspace-1.png)
You can then select the users or groups you want to share your workspace with and assign edit permissions the same way as you would with sharing a map. When sharing a workspace, you can also give the user permission to create additional maps within the workspace.
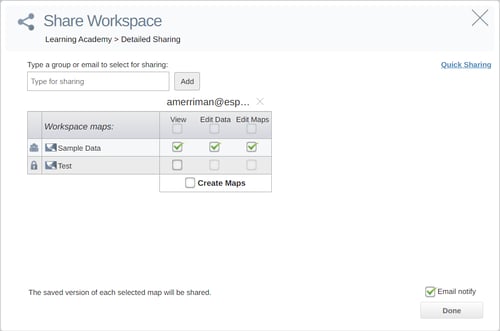
The Detailed Sharing section allows you to specify which maps within the workspace should be shared with which users along with what permissions they have over these maps.
Sharing Datasets
You can share datasets from your library. These datasets can then be used by members of your team to create other maps. If you give your team members editing permission, then any edits they make will be reflected in your own dataset and any maps it is used in.
To share a dataset, open the Datasets tab in your Library and click on the dataset you wish to share. This will then open the Dataset details window. Then, click the Actions dropdown and select the Share option to open the Share Dataset window. You can then select Share within team and choose the groups or users that you want to share with.

Exporting
Exporting Your Data
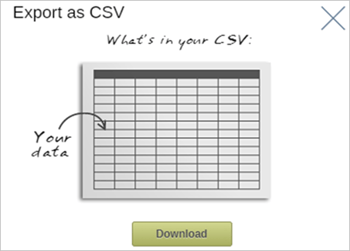
You can export the data from your map to CSV. This can be used to create a backup of your data especially when you have edited or added records within eSpatial. You can also export the results of analysis, or after the data is filtered as only the data filtered in your table will export.
To export your data, expand your table and select the Export button.

A Download window will then appear, select the Download button and navigate to the folder you wish to export your data to.
Exporting your map
There are three options for exporting your map including Print, Export as PDF and Export as MapBook. Please note that all of the export options will use the default Roadmap basemap regardless of which basemap is currently active.
If you would like to export your map as a high-quality static image for printing or sharing, you can use the Print button (printer icon) at the bottom of the Control Panel. The map will be exported as a JPEG.

After clicking on on the Print button at the bottom of the Control Panel, the Print Preview window will open.

Here you can select a page size using the drop down. Each Page Size will be suitable for printing at certain size and dpi.
- Small – Suitable for A6 printing at 150 dpi
- Regular – Suitable for A4 printing at 150 dpi
- Large – Suitable for A3 printing at 300 dpi
- X Large – Suitable for A1 printing at 300 dpi
You can crop your map view by dragging each corner of the map, and zoom in or out using the + and - buttons in the bottom left of your map view. Then choose your Format of either Landscape or Portrait. Once you are happy with your choices click on the Download button to download your map as a JPEG. This will be saved to the download folder for your browser.
Export as PDF
You can export your map as a PDF which can display your Map, Legend, Chart and Table. To export your map as PDF, select the Export button (arrow icon) at the bottom of the Control Panel and select the PDF option in the Export window.
Then select Yes or No from the drop down to choose whether to include or exclude the table. Click on the Download button to finish your export and return to the map. Your PDF containing your map legend and table will then be downloaded.
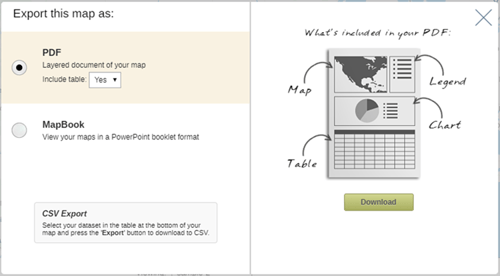
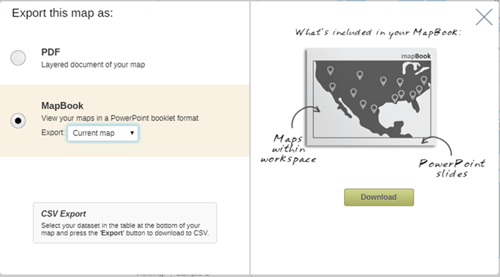
Export as MapBook
You can export your current map or all the maps in your workspace to a MapBook presentation. This exports your map or maps to a Microsoft PowerPoint file with a slide for each map. To export your map to a MapBook, select the Export button in the Control Panel and select the MapBook option in the Export window. Click on the Download button to finish your export and return to the map. Your MapBook containing your map legend and table will then be downloaded.